 Adhorika Khan
A pimple arrives with a schedule conflict: the interview, the wedding, the reunion — and full-face foundation is exactly the wrong response. Covering a pimple convincingly is a precision job: calm it first (ice or a patch), prime the terrain, color-correct the red, then layer thin coats of full-coverage concealer with a small brush — set, and stop touching it. Done right, a angry red spot becomes an unremarkable nothing in four minutes, without the cake-dome that announces “concealed pimple” louder than the pimple did.
This is the complete concealment guide: prep that makes coverage possible, the color-correction cheat, the layering-and-setting method for flat and raised spots, texture honesty (you can hide color, not altitude), scab and picked-spot rescue, and the wear-through-the-day protocol.
Key Takeaways
- Calm before you cover: ice (or a morning patch session) shrinks the red and the bump — half the concealment before any makeup.
- You can hide COLOR, not HEIGHT: flatten expectations for raised spots — matte, precise, and un-touched beats domed and caked.
- Green neutralizes red — a whisper of corrector under concealer beats five layers of concealer alone.
- Thin layers, small brush, exact match: your foundation-undertone concealer, patted in coats, set once with powder.
- Hands off all day: every touch lifts the work and re-inflames the spot — the discipline IS the longevity.
Step Zero: Calm the Spot First
Concealer covers color; it amplifies texture — so everything that shrinks the bump before makeup is coverage you don’t have to paint. The morning protocol: if you wore a hydrocolloid patch overnight, you’re starting flattened; if not, an ice cube wrapped in cloth, pressed in 30-second intervals for a few minutes, visibly reduces redness and swelling. The don’ts that sabotage coverage: no popping before an event (a weeping spot cannot be concealed — a scab can, barely; an intact bump conceals beautifully), no strong spot-treatment acids the same morning (flaking skin under concealer is the texture nobody can paint over — treatment is for tonight), and moisturize normally — concealer grips hydrated skin and clings to dry patches. This is the treatment-first philosophy in event-day form: the routine shrinks what makeup then merely tints.
The Kit: Four Things, No More
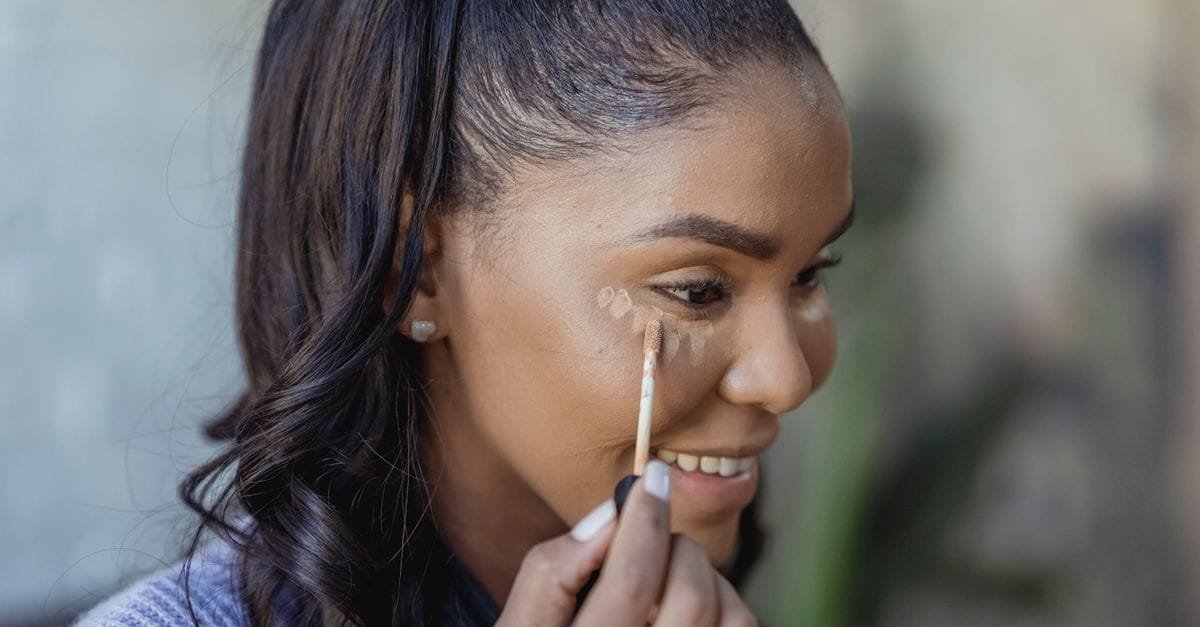
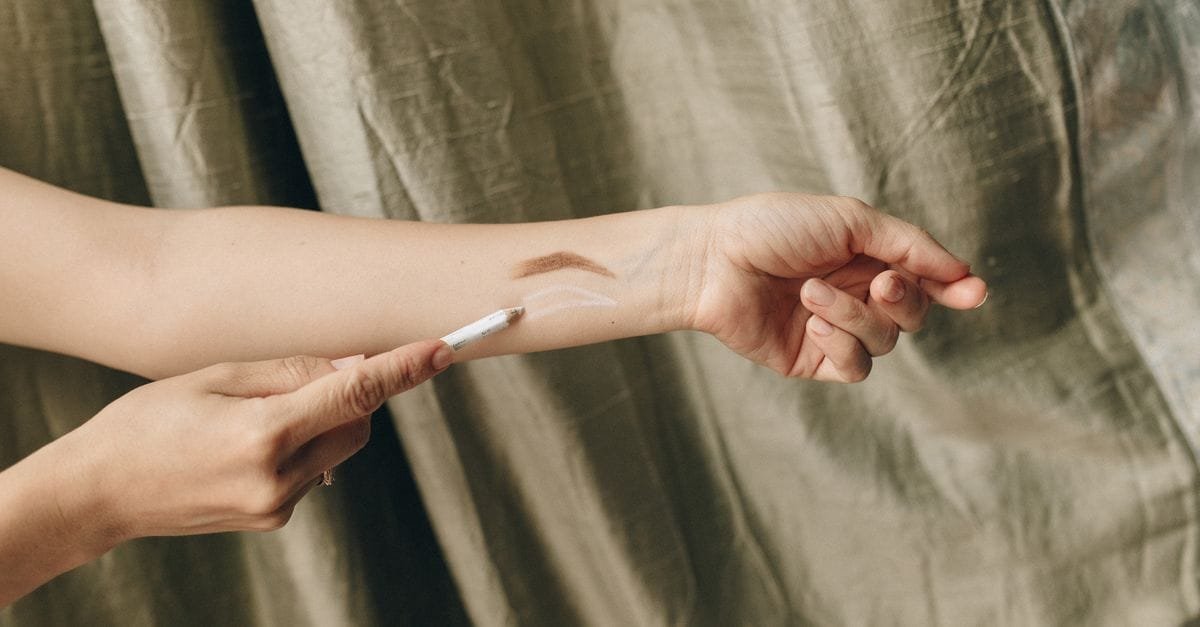
1. A full-coverage concealer matched to your foundation shade and undertone — the under-eye brightening shade is one step too light for blemishes (a highlighted pimple is a spotlit pimple); many people need two concealers for two jobs. 2. A small, firm, synthetic brush — the precision instrument; fingertips work for blending edges, but placement wants bristles (clean ones — the hygiene rules matter double over broken-out skin). 3. A green color corrector — optional but transformative for angry-red spots. 4. Finely-milled translucent powder and a small puff. That’s the whole arsenal; our concealer picks cover the shopping.
The Method: Flat Red Spots (The Easy Case)
1. Corrector, if red is loud: a literal pinhead of green corrector tapped ONLY on the red zone with the brush tip — sheer to invisibility; green’s job is neutralizing, not painting a mint dot. 2. First concealer coat: a thin layer over the spot and one millimeter beyond, patted (never wiped) with the brush, then the edges tapped diffuse with a fingertip. 3. Assess, then second coat only where color still ghosts through — two thin beats one thick, forever and always (the cakey guide’s whole philosophy at blemish scale). 4. Set once: the smallest amount of translucent powder pressed on with a puff corner — this locks the work and kills the concealer-shine that draws eyes. 5. Leave. It. Alone.
The Method: Raised Spots (The Honesty Case)
Height casts shadows, and no pigment paints over a shadow — so the strategy shifts from “invisible” to “unremarkable.” Matte everything: shimmer, dewy skin tints, and highlighters magnify altitude; a matte-finish concealer, matte-set, minimizes it. Precision over coverage: paint the spot exactly — flooding the neighborhood with product builds the cake-dome that reads from across the room. Redirect the eye: this is the day for the bold lip, the defined blush lift, the good brow — faces are read as wholes, and attention follows emphasis. And the day-of reality check: a matte, color-neutralized, un-touched bump is genuinely unremarkable at conversation distance; the mirror at ten centimeters is not how anyone sees you (the perspective paragraph that belongs in every blemish article).
The Scab and Picked-Spot Rescue
The morning-after-picking scenario has its own physics: concealer on a fresh scab clings to edges and flakes centers. The salvage protocol: rehydrate first — a dab of moisturizer or balm softening the scab for five minutes, gently pressed (never rubbed) off; skip powder on the scab itself (powder + scab = cornflake); use a damp-sponge press of concealer rather than brush strokes — the sponge lays product over irregular texture more forgivingly; seal with setting spray rather than powder for this zone. And tonight: a patch on the picked site, both for healing and as a physical restraining order — the patch guide’s favorite prevention story is exactly this morning, avoided.
Wearing It All Day: The Longevity Protocol
The touch ban is 80% of wear-time — every absent-minded graze lifts pigment and deposits oil (and re-inflames the spot; fingers are why it’s still here). Blot, don’t wipe, when shine arrives — pressing paper lifts oil without disturbing the paint. The micro-touch-up kit: the same concealer and a cotton swab in the bag — a thirty-second refresh at hour six beats a full redo. SPF reality: on long sun days, the reapplication methods work over concealed spots too — press, never rub, around the concealed zone. End of day: full, gentle removal (double cleanse if the coverage was layered — residue in a healing pore is tomorrow’s sequel), then treatment: patch or spot treatment overnight, so tomorrow needs less paint. Cover by day, treat by night — the two-shift system that ends the cycle instead of maintaining it.
Covering Different Spot Types: The Field Notes
Whiteheads: the white peak reads through concealer — this is the one case where careful extraction-by-professional or an overnight patch first genuinely changes the makeup outcome; painting over an intact whitehead, use the matte-precision method and accept “minimized.” Healing red-brown marks (the post-pimple ghost): the easiest cover in the category — peach or orange corrector (by depth) under concealer neutralizes brown-adjacent marks the same way green kills red; and the fading actives are retiring these marks in the background anyway. Clusters: resist the urge to spackle the region — conceal each spot individually with the brush, then one sheer unifying pass of your base over the zone; individual precision reads as skin, regional coverage reads as a patch. Under-makeup patches: the thin hydrocolloids designed for daytime wear go on FIRST (clean dry skin), then makeup over — the patch guide’s order of operations.
The Mistakes That Announce a Concealed Pimple
The light-shade spotlight (under-eye brightener on a blemish — now it’s illuminated); the dome (five thick coats building visible altitude); the dry-patch cling (concealer over un-moisturized or acid-flaked skin); the shine beacon (unset cream concealer catching light while surrounding skin sits matte); the touch-erosion (perfect at 9 am, gone by lunch, via fingers); and the texture fight (trying to paint over a weeping or freshly-popped spot — the one scenario where the honest answer is a patch, a sick-day for that spot, and better luck tomorrow). Every one is avoidable with the thin-precise-matte-set-untouched doctrine above.
The Four-Minute Event-Morning Script
0:00 — wrapped ice on the spot while the kettle boils. 1:00 — normal skincare, moisturizer everywhere, SPF; two minutes settle. 2:30 — pinhead of green on the red, patted sheer. 3:00 — first thin concealer coat, brush-patted, edges fingertip-blended; breathe; second coat where needed. 3:45 — powder-press set. 4:00 — hands in pockets, confidence on, out the door. The spot is now the least interesting thing about your face — which was, precisely, the assignment.

The Minimal-Makeup and No-Makeup Versions
Not every face wants full paint over one spot, and the scaled-down options work: the concealer-only cover — bare skin, SPF, and the four-minute precision protocol on the spot alone reads as “great skin with nothing on” better than full-face coverage ever does (individual precision over regional spackle, always); the tinted-moisturizer compromise — sheer wash everywhere, concealer precision on the spot, five minutes total; the daytime-patch-only option — a thin matte hydrocolloid worn bare is genuinely less noticeable than most people fear at conversation distance, treats while it hides, and wins the “working from home but on camera” scenario outright; and the zero-cover option — a calmed, iced, un-picked spot worn plainly is a normal human face, and normal human faces are having a well-deserved moment. The concealment skill is for the days you want it — never a tax owed for having skin.
Men, Teens, and First-Timers: The Same Four Minutes
The technique is universal and the products are shade-matched, not gendered: a matched concealer, a clean fingertip or brush, thin patted layers, and the touch ban work identically on every face — and the teen guide’s confidence math applies doubly here: four minutes of precision beats a day of spot-consciousness. First-timer shopping note: buy the concealer in person once (shade-matched at the jaw in daylight, per the undertone guide), and the online repurchases are solved forever. The tube lasts most of a year of incidents; the skill lasts for all of them.
The Bottom Line
Covering a pimple is a precision craft with honest limits: calm it, correct the red, layer thin and exact, set once, and never touch it again — while accepting that color hides and height only minimizes. Pair the day-shift concealment with the night-shift treatment, and the whole category shrinks to what it always was: a four-minute skill and a spot that nobody at the party will remember, including — eventually — you.
The precision kit:
The precision kit:
Frequently Asked Questions
How do you cover a pimple without it looking cakey?
Thin layers, small area: pat a pinhead of concealer over just the spot with a firm brush, add a second thin coat only where color shows, and set once with pressed translucent powder. Thick single coats and wide coverage zones are what build the cake.
Does green concealer really work on pimples?
For redness, genuinely — green sits opposite red on the color wheel and neutralizes it. Use a sheer pinhead under your regular concealer, tapped only on the red zone; it halves the coverage the concealer must do alone.
Should I pop a pimple before covering it with makeup?
No — an intact bump conceals well; a freshly popped, weeping spot cannot be painted and scars besides. If it’s already popped, patch it, or use the damp-sponge scab protocol and setting spray instead of powder.
What concealer shade covers pimples best?
Your exact foundation shade and undertone — not the lighter under-eye shade, which spotlights the spot. Many kits need two concealers: light for brightening, exact-match for blemishes.
How do I cover a pimple scab?
Soften it first — five minutes with a dab of balm, gently pressed off — then press concealer over it with a damp sponge and seal with setting spray, skipping powder on the scab itself.
Can I put concealer over a pimple patch?
Over the thin matte daytime patches, yes — patch goes on clean, dry, bare skin first, then makeup over it. The thick overnight domes aren’t designed for coverage.
Why does my concealed pimple show through by midday?
Usually touching (fingers lift the work), shine (unset concealer catching light), or oil breakthrough. Set it once in the morning, ban your hands, blot before any touch-up, and refresh with a cotton swab rather than redoing.
How do you cover a pimple without concealer?
Calm it (ice), then either a thin daytime hydrocolloid patch worn bare, or a dab of tinted moisturizer or SPF tint pressed on the spot. Reducing the red is most of the game; ice alone does surprising work.
Does makeup make pimples worse?
Non-comedogenic products applied with clean tools and fully removed at night — generally no. Dirty brushes, all-day touching, and slept-in makeup — yes. The hygiene habits decide, not the makeup itself.
What color corrector covers pimple redness?
Green — it sits opposite red on the color wheel. Use a sheer pinhead only on the red zone, under your skin-matched concealer. Peach and orange correctors handle the brown post-pimple marks instead.
Can I cover a pimple on my lip line or nose?
The mobile zones are the hardest real estate: use long-wear concealer in the thinnest layers, set with powder pressed (not dusted), and expect one midday cotton-swab refresh. On the nose creases, less product survives longer than more.
How do I cover a pimple for a video call?
Cameras exaggerate shine, not texture — matte precision concealer, set well, and good front lighting beats heavy coverage. The daytime patch worn bare is also nearly invisible on webcam resolution.
Should I skip skincare before covering a pimple?
Never — moisturizer and SPF go on first and make the coverage possible; concealer clings to dry patches and slides off unprepped oil. Only the strong acids wait for the evening.

 Adhorika Khan